

DIY Gun Storage Solutions: Build Safe, Smart, and Custom
DIY gun storage solutions are customized methods for organizing, securing, and preserving firearms at home using purpose-built racks, cabinets, closet conversions, and safe upgrades. The best setups combine layered security, proper spacing, humidity control, and quality protective materials. Firearm storage professionals recognize this approach as “layered security storage,” meaning no single lock or cabinet carries all the risk. Getting these fundamentals right protects your investment, keeps firearms accessible when needed, and keeps them away from unauthorized hands.
1. Essential design principles for DIY gun storage
Good DIY gun storage starts with spacing and structural integrity. Maintain 8–10 inches of vertical clearance for long guns and 3–4 inches of horizontal clearance for pistols. That spacing prevents muzzle-to-butt contact and scope interference, which are the two most common causes of finish damage in homemade gun racks.
Structural supports matter as much as spacing. Ledger boards and steel back plates distribute load across wall studs rather than concentrating weight on a single anchor point. A rack holding six rifles can weigh over 50 lbs when loaded, and drywall anchors alone will not hold that long term.
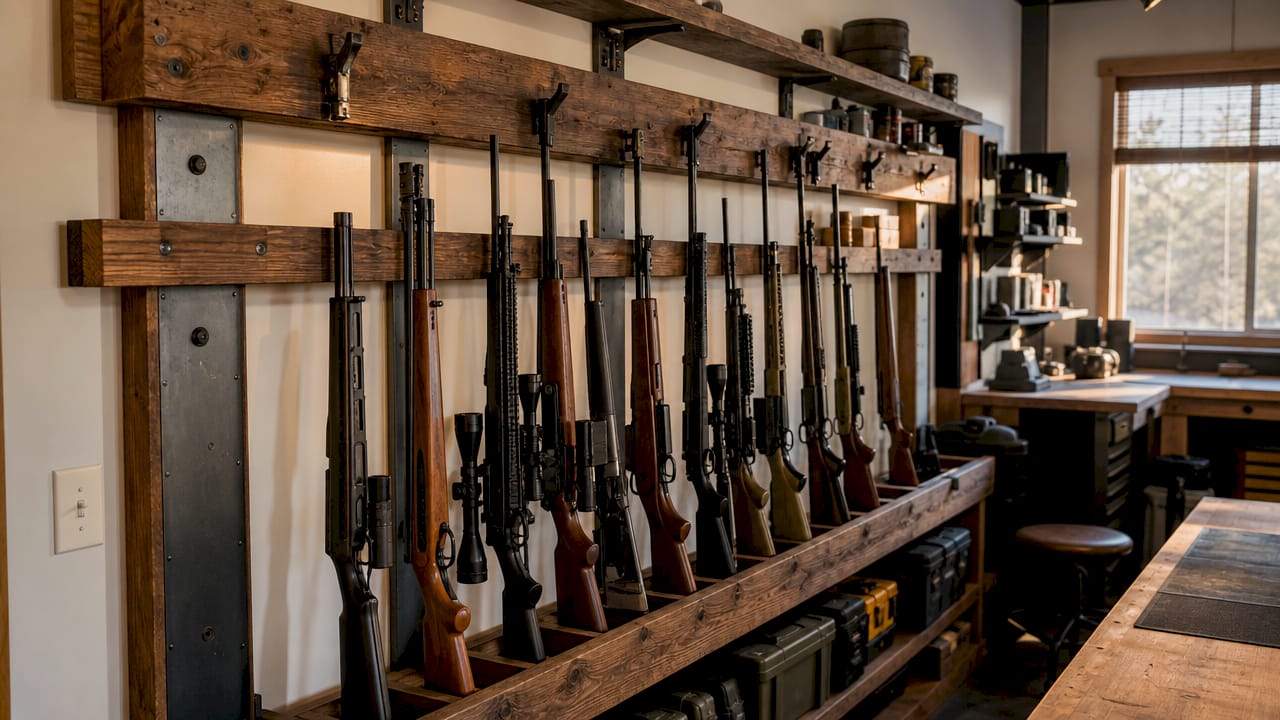
Humidity control is non-negotiable. To keep storage humidity below 50% using renewable desiccant packs or a Goldenrod electric heater. Moisture above that threshold accelerates rust on carbon steel and pitting on blued finishes within weeks.
Lighting is an overlooked factor. 4000K diffused LEDs provide neutral white light that makes it easy to identify firearms and check chamber status without glare. Mount them at the top of a gun wall or inside a cabinet door for best results.
Security layering completes the design. Lockable shields with tamper-resistant Torx-pin screws and silent motion sensors add mechanical and electronic deterrence without alerting intruders to the location of your firearms.
Pro Tip: Install a hygrometer inside every enclosed storage space. A $15 digital unit gives you real-time humidity and temperature readings, so you catch moisture problems before they damage a finish.
2. Creative gun storage ideas: racks, walls, and closet conversions
A gun wall built on slatwall panels, pegboard, or T-slot aluminum rails gives you the most flexible storage system available. You can reposition hooks, barrel rests, and handgun mounts without drilling new holes. T-slot aluminum is the strongest option and handles heavier rifles without flex.
DIY racks with felt padding and staggered spacing work well for scoped rifles. Stagger the barrel rests at alternating heights so scope turrets clear the stock of the gun below. Without staggering, a standard rack forces scoped rifles to sit at an angle or not fit at all.
Closet conversions are the most underused option in budget gun storage. Reinforce the door with a steel security bar or a door jamb armor kit. Add adjustable shelving on one wall for pistols and accessories, and mount a vertical rack on the opposite wall for long guns. Install a small ventilation fan and a desiccant pack to manage humidity in the enclosed space.
Pro Tip: Organize firearms by type and caliber, not by size. Grouping by caliber means you grab the right gun and the right ammunition together during an emergency retrieval.
Hidden storage and concealment furniture serve as a secondary security layer. A mirror cabinet, a bookshelf with a false back, or a coffee table with a locking compartment adds concealment without replacing a primary safe. Layered security including decoys and distributed storage minimizes total loss risk if a primary storage point is compromised.
- Choose your wall system: slatwall, pegboard, or T-slot aluminum.
- Map firearm positions before drilling, accounting for scope height and barrel length.
- Install ledger boards across at least two studs for structural support.
- Add felt or foam padding to all contact points.
- Mount lighting at the top of the display area.
- Install a lockable shield or cabinet door over the entire wall section.
- Add a hygrometer and desiccant pack inside any enclosed section.
3. How to upgrade gun safe interiors with DIY shelving
Factory safe interiors waste space. Most ship with one or two fixed shelves and a barrel rack that fits only upright long guns. Custom shelving recovers that lost space without compromising the safe’s fire or lock integrity.
Start by measuring the interior carefully. Account for material thickness and clearance around the fire liner and lock bolt housing before cutting any shelf. A shelf that contacts the fire liner can crack it, which voids most fire ratings.
Build freestanding shelf towers rather than wall-mounted units inside the safe. A freestanding tower sits on the safe floor and requires no drilling into the safe walls. Use 3/4-inch plywood with a felt liner on every shelf surface.
Custom felt-lined racks and staggered barrel rests prevent scope and bolt handle interference between adjacent firearms. Cut notches at alternating depths so each barrel rests at a slightly different height.
Load management protects your shelving long term. Place heavy ammunition low and store pistols and documents on upper shelves. Bottom-heavy loading lowers the center of gravity and prevents shelf sag under sustained weight.
- Measure twice before cutting any shelf material.
- Use 3/4-inch plywood for shelves holding firearms or ammunition.
- Line every contact surface with felt or closed-cell foam.
- Build freestanding units to avoid drilling into safe walls.
- Stagger barrel rests to prevent scope and bolt handle clashes.
- Keep heavy items on the lowest shelf.
Pro Tip: Cut a cardboard template of your safe interior before building in wood. Test the template fit first, then transfer measurements to plywood. This saves material and prevents costly mistakes.
4. Maintaining firearm condition in DIY storage
The optimal humidity range for firearm storage is 30–50%. Below 30%, wooden stocks can crack. Above 50%, metal surfaces begin to corrode. A digital hygrometer mounted inside the storage space gives you a continuous reading.
Renewable desiccant packs and Goldenrod electric rod heaters are the two most practical humidity control tools for enclosed DIY storage. Desiccant packs work without electricity and suit smaller spaces. Goldenrod heaters circulate warm air to prevent moisture condensation and work best in larger safes or closet conversions.
The choice of protective sleeve matters more than most gun owners realize. True cotton gun sacks with silicone treatment wick moisture away from metal surfaces and do not melt under heat. Plastic sleeves trap moisture against the barrel and accelerate the corrosion they are supposed to prevent. Sackups gun sacks use a cotton blend with a silicone treatment that has protected firearms since 1985.
Avoid common off-season storage mistakes like storing firearms with a heavy oil coat. A light wipe of oil is enough. Excess oil attracts dust, migrates into the action, and can contaminate powder in stored ammunition.
Separate ammunition storage physically from firearms and lock it independently. Most state storage laws require this separation, and it adds a practical safety layer in homes with children.
- Monitor humidity with a digital hygrometer.
- Use desiccant packs or a Goldenrod heater to stay in the 30–50% range.
- Store firearms in cotton gun sacks, not plastic sleeves.
- Apply a light oil coat only. Heavy oil attracts debris and damages actions.
- Store ammunition separately in a locked container.
Pro Tip: Rotate your desiccant packs on a calendar schedule, not when you remember. Mark the recharge date on the pack with a permanent marker when you install it.
Key takeaways
The most effective DIY firearm storage combines layered security, precise spacing, active humidity control, and quality protective materials to preserve both access and condition.
| Point | Details |
|---|---|
| Spacing prevents damage | Use 8–10 inches vertical for long guns and 3–4 inches horizontal for pistols. |
| Humidity control is critical | Keep storage between 30–50% humidity using desiccants or a Goldenrod heater. |
| Layered security reduces risk | Combine locks, tamper-resistant hardware, and silent motion alerts for full coverage. |
| Cotton sacks outperform plastic | Silicone-treated cotton wicks moisture; plastic traps it and accelerates corrosion. |
| Load management protects shelving | Place heavy ammunition low and lighter items high to prevent sag and damage. |
What I’ve learned building gun storage that actually works
Most gun owners build their first storage setup around display, not security. They want the guns visible and accessible, which is understandable. But a wall full of firearms with no lockable cover is a liability, not a feature.
The shift I’d recommend is thinking in layers. Your perimeter is the first layer. Reinforced doors and visible cameras reduce burglary risk significantly before an intruder ever reaches your storage. The second layer is the storage itself, whether a safe, a locked cabinet, or a secured closet. The third layer is concealment, meaning not every firearm needs to be on display.
Spacing and padding are where most DIY builds cut corners. A rifle with a $1,200 scope sitting against another rifle’s barrel will show contact marks within a season. Felt costs almost nothing. Proper spacing costs only planning time. Neither is optional.
The moisture piece gets ignored until it is too late. I have seen blued rifles with surface rust after a single humid summer in a garage safe with no humidity control. A $15 hygrometer and a $10 desiccant pack would have prevented it entirely. Cotton gun sacks add another layer of protection that plastic never will.
Build incrementally. Start with the spacing and structural integrity. Add humidity control next. Then upgrade the security layers. A well-built storage system takes a few weekends, not one afternoon.
— Josh
Sackups gun sacks for your DIY storage setup
Every DIY storage build benefits from a final layer of individual firearm protection. Sackups makes cotton gun sacks in the USA using a true cotton blend with a silicone treatment that wicks moisture and resists heat.

The Model 104 scoped rifle sack fits large scoped rifles and AR-pattern firearms, making it the right choice for custom racks holding optic-equipped guns. For protecting multiple rifles in a safe or closet rack, the Model 108 four-pack covers four 52-inch rifles at once. Both models slide easily over barrels and stocks without snagging, and the cotton construction breathes rather than trapping moisture against the metal. Browse the full lineup at sackups.com to find the right fit for your collection.
FAQ
What is the safest DIY gun storage option for a home with children?
Legal compliance increasingly requires a UL RSC-rated safe combined with a separate biometric bedside safe for quick-access needs. Both units should be locked at all times when not in direct use.
How do I control humidity in a DIY gun cabinet?
Keep humidity between 30–50% using a renewable desiccant pack or a Goldenrod electric heater inside the cabinet. A digital hygrometer confirms the reading in real time.
Can I build custom shelving inside a factory gun safe?
Yes. Build freestanding plywood shelf towers that sit on the safe floor without drilling into the walls. Measure carefully to preserve clearance around the fire liner and lock bolt housing.
What is the best material for lining DIY gun racks?
Felt and closed-cell foam are the standard choices for rack contact points. Both prevent finish scratches and absorb minor impacts without retaining moisture.
Why should I use cotton gun sacks instead of plastic sleeves?
Cotton gun sacks with silicone treatment wick moisture away from metal surfaces. Plastic sleeves seal moisture against the barrel, which accelerates rust rather than preventing it.